
Notice
Recent Posts
Recent Comments
Link
| 일 | 월 | 화 | 수 | 목 | 금 | 토 |
|---|---|---|---|---|---|---|
| 1 | 2 | 3 | ||||
| 4 | 5 | 6 | 7 | 8 | 9 | 10 |
| 11 | 12 | 13 | 14 | 15 | 16 | 17 |
| 18 | 19 | 20 | 21 | 22 | 23 | 24 |
| 25 | 26 | 27 | 28 | 29 | 30 | 31 |
Tags
- 서울근교두루치기
- 큐넷 4대보험
- 벤큐 EX2510S
- 벤큐 EX2510
- 벤큐 EX2510S 후기
- vuetify 설치
- 경기도광명맛집추천
- 큐넷 사실확인서
- 큐넷 폐업
- 큐넷 사대보험
- 경기도광명돼지집
- eslint prettier차이
- 시험장소변경
- vue 설정
- 큐넷 필기시험장소 변경
- 큐넷 폐업 사대보험 미가입
- 4대보험미가입 경력증명서
- 큐넷 시험 변경
- vue.js 로그인
- vue eslint설정
- BENQ EX2510S REVIEW
- 광명돼지집
- 큐넷 4대보험미가입
- EX2510S음질
- 정보처리기사 시험장도 변경
- vue prettier
- HTML CSS Support
- vue 로그인
- 광명김치찌개
- 큐넷 시험장소 변경
Archives
- Today
- Total
코딩 발걸음 - 한발두발개발
React Material-UI를 이용한 회원가입만들기 본문
728x90
1. Material-UI 인스톨하기
npm install @material-ui/core
npm install @material-ui/icons
위 코드 외에도 Material-UI에서 제공하는 Component나 Template 필요한것들 마찬가지로 install 해줘야 한다.
우리가 붙일 SignUp 템플릿또한 core외에도 icons라는 것이 필요하기 때문에 인스톨을 해준다.
2. 컴포넌트 붙여넣기
먼저 네비게이션 탭을 붙인다.(안붙여도 상관 없다.)
https://material-ui.com/components/tabs/ 나 적당한 Component를 찾고 붙여준다.
Component를 관리할 폴더에 Menu라는js를 따로 만들어서 임포트를 해주었다.
import './App.css';
import Menu from './components/Menu';

function App() {
  return (
    <div className="App">
      <Menu></Menu>
    </div>
  );
}

export default App;
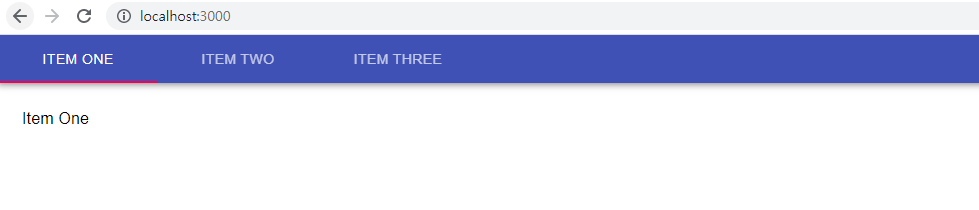
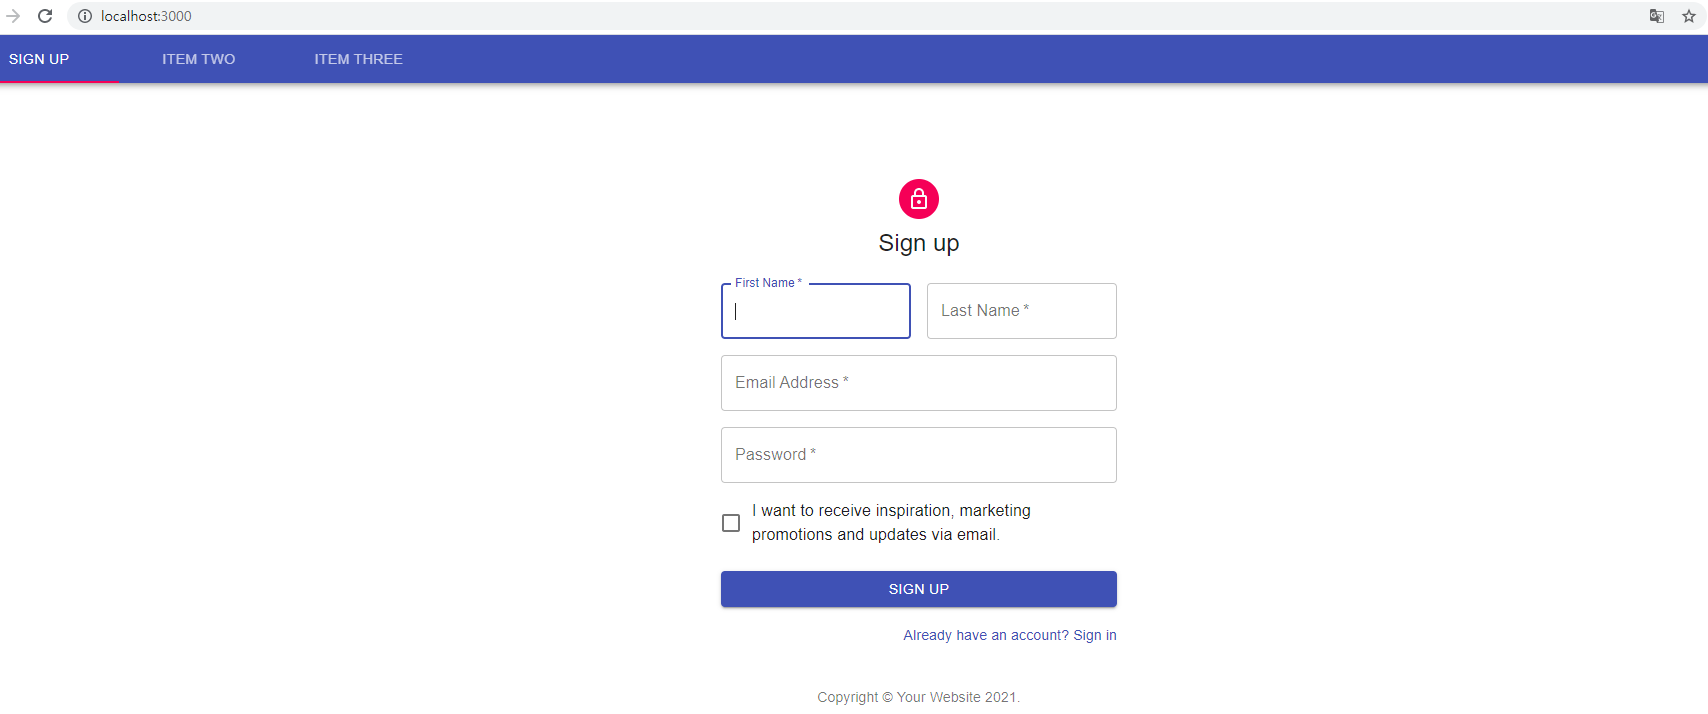
탭명 변경 및 ITEM ONE자리에 SignUp페이지를 임포트 해준다.
import React from 'react';
import PropTypes from 'prop-types';
import { makeStyles } from '@material-ui/core/styles';
import AppBar from '@material-ui/core/AppBar';
import Tabs from '@material-ui/core/Tabs';
import Tab from '@material-ui/core/Tab';
import Typography from '@material-ui/core/Typography';
import Box from '@material-ui/core/Box';
import SignUp from './SignUp';

function TabPanel(props) {
  const { children, value, index, ...other } = props;

  return (
    <div
      role="tabpanel"
      hidden={value !== index}
      id={`simple-tabpanel-${index}`}
      aria-labelledby={`simple-tab-${index}`}
      {...other}
    >
      {value === index && (
        <Box p={3}>
          <Typography>{children}</Typography>
        </Box>
      )}
    </div>
  );
}

TabPanel.propTypes = {
  children: PropTypes.node,
  index: PropTypes.any.isRequired,
  value: PropTypes.any.isRequired,
};

function a11yProps(index) {
  return {
    id: `simple-tab-${index}`,
    'aria-controls': `simple-tabpanel-${index}`,
  };
}

const useStyles = makeStyles((theme) => ({
  root: {
    flexGrow: 1,
    backgroundColor: theme.palette.background.paper,
  },
}));

export default function SimpleTabs() {
  const classes = useStyles();
  const [value, setValue] = React.useState(0);

  const handleChange = (event, newValue) => {
    setValue(newValue);
  };

  return (
    <div className={classes.root}>
      <AppBar position="static">
        <Tabs value={value} onChange={handleChange} aria-label="simple tabs example">
          <Tab label="Sign Up" {...a11yProps(0)} />
          <Tab label="Item Two" {...a11yProps(1)} />
          <Tab label="Item Three" {...a11yProps(2)} />
        </Tabs>
      </AppBar>
      <TabPanel value={value} index={0}>
      	//SignUp을 넣었다.
        <SignUp></SignUp>
      </TabPanel>
      <TabPanel value={value} index={1}>
        Item Two
      </TabPanel>
      <TabPanel value={value} index={2}>
        Item Three
      </TabPanel>
    </div>
  );
}
3. input 데이터 바인딩
이제 input요소를 바인딩해주고 비동기 통신을 이용하여 데이터를 날려주면 된다.
여러개의 input데이터를 바인딩하는 방법은 따로따로 바인딩을 해주던가 혹은 input에 있는 value들을 묶어 객체로 만들어 바인딩 해주던지 해야한다. 따로따로 바인딩을 해줄경우 코드가 그 만큼길어지니 추천하지 않는다.
한번에 관리 할수있도록 객체로 된 values들을 useState를 이용하여 생성한다.
const [values, setValues] = useState({ firstname: "", lastname: "", email : "", password : "" });
그 후 input값이 바뀔때 마다 바뀐 값을 name, value값으로 복사해준다.
const handleChange = (event) => {
  const { name, value } = event.target;
  setValues({ ...values, [name]: value });
};

...중략

<Grid item xs={12} sm={6}>
  <TextField
    autoComplete="fname"
    name="firstname"
    variant="outlined"
    required
    fullWidth
    id="firstname"
    label="First Name"
    autoFocus
    onChange={handleChange}
  />
</Grid>
<Grid item xs={12} sm={6}>
  <TextField
    variant="outlined"
    required
    fullWidth
    id="lastname"
    label="Last Name"
    name="lastname"
    autoComplete="lname"
    onChange={handleChange}
  />
</Grid>
<Grid item xs={12}>
  <TextField
    variant="outlined"
    required
    fullWidth
    id="email"
    label="Email Address"
    name="email"
    autoComplete="email"
    onChange={handleChange}
  />
</Grid>
<Grid item xs={12}>
  <TextField
    variant="outlined"
    required
    fullWidth
    name="password"
    label="Password"
    type="password"
    id="password"
    autoComplete="current-password"
    onChange={handleChange}
  />
</Grid>
4. axios를 이용한 전달
프론트서버
const handleClick = async () => {
	await axios.post('/api/createUser', values)
	.then((Response)=>{
		alert(Response.data)
	})
	.catch((Error)=>{
		console.log("통신 실패 + \n" + Error)
	})
};

.... 중략

<Button
  type="button"
  fullWidth
  variant="contained"
  color="primary"
  className={classes.submit}
  onClick = {handleClick}
>
Sign Up
</Button>
백엔드 서버
app.post('/api/createUser', (req, res) => {
    var f_name = req.body.firstname;
    var l_name = req.body.lastname;
    var email = req.body.email;
    var pw = req.body.password;
    var sql = `INSERT INTO react_db.members VALUES('${f_name}', '${l_name}','${email}','${pw}')`;
    db.query(sql, (err, data) => {
        if (err) {
            res.send('회원가입에 실패하였습니다.');
        } else{
            res.send('회원가입에 성공하였습니다.');
        }
    });
});
5. 데이터 확인

'개발 > React.js' 카테고리의 다른 글
| React UI Library (0) | 2021.07.16 |
|---|---|
| React - 함수형 Component 와 클래스형 Component의 차이 (0) | 2021.07.16 |
| React Api를 이용하여 Database에서 Data 가져오기 (0) | 2021.07.15 |
| Client 서버와 Express 서버 동시에 실행하기 (feat. Concurrently) (0) | 2021.07.14 |
| 리액트 와 CSide Rendering vs Server Side Rendering (CSR SSR 차이) 그리고 MPA 와 SPA (0) | 2021.07.14 |
'개발/React.js' Related Articles
more

